By Juan Wilson on 26 may 2011 for Island Breath -
(http://islandbreath.blogspot.com/2011/05/solar-oven-part-three.html)
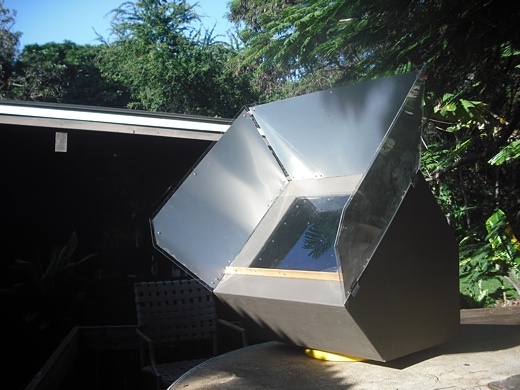
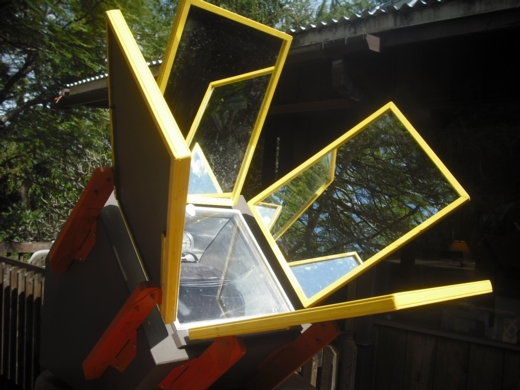
Image above: Prototype by with solar reflectors and a yellow plastic lid to pivot the oven into the sun. All photos by Juan Wilson.
At the end of Part -2 of this series on solar ovens I had completed making an insulated box with a tempered glass insulated window to the sun. It got warm and held heat, but did not do enough of either. Top air temperature in the oven was about 160º. The temperature was measured with a oven thermometer from Big Save supermarket ($5). I realized that I would need to reflect more light as well as absorb more heat into my prototype A solar oven for it to actually cook food.
Prototype B
Prototype B was different from A in three significant ways.
First: I removed the tempered insulated glass window I had found on a small beverage refrigerator. It was not totally clear glass and simply filtered out too much sunlight; perhaps as much as 20%. I replaced it with a single sheet of 1/8" thick clear tempered glass from an interior refrigerator shelf I found amongst the recycled appliances at the Kauai County Hanapepe Transfer Station.
Second: I chose to spray the raw pine boards with black paint. Originally I was concerned that a painted surface that got heated to several hundred degrees would off-gas chemicals that could "flavor" food in the oven. I selected a spray paint I thought might work. Ace hardware has a line of "Rust Stop" spraycan paints. One called 'Barbeque Black 1000º F" is designed for barbeque grills, cast iron stove and fireplace equipment. It claims to withstand 1000º fahrenheit temperature.
Third: I added reflectors to the sides and top of the mouth of the oven. These reflectors would have been made out of polished mirrored aluminum sheet if I could have afforded it. I found a source (http://www.anomet.com/reflective_aluminum.html) that would sell 24"x48" single sheets of 97% reflective aluminum, but the cost of getting two sheets to Kauai was about $200. You can buy a commercial solar oven for that much. Instead I chose to try a role of 12" wide aluminum flashing.
A 50 foot roll was over $30. The flashing needed to lay flat as well as have some stiffness and protection. I selected to use thin clear plexiglas. Both the flashing and plex were available as the Eleele Ace hardware. I cut the aluminum flashing with shears into 12" tall trapazoids. The angle on the acute corners of the trapazoid I used was 69º.
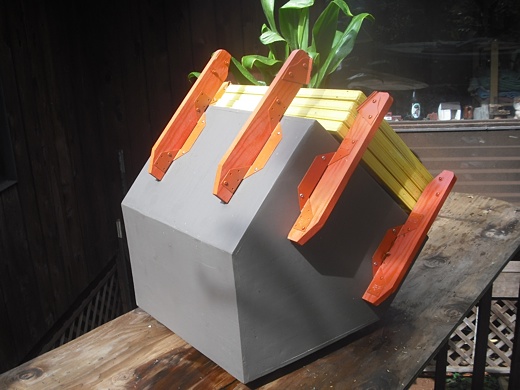
I used a matte-knife (box-cutter) to cut the plex with a 1/2" over hang on the outer edges. This protected the flashing edges as well as my fingers. I drilled holes to line up the pieces and used stainless steel bolts, nuts and washers to assemble the reflector panels. small hinges were used to allow them to fold back against the body of he oven when not in use. When the panels were "up" I kept them secure with brocolli rubberbands over the extra long bolts at the trapazoid corners. Then wind was never a problem.
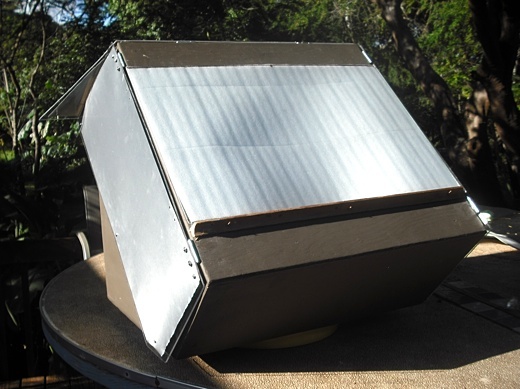
Finally, I bought a auto windshield heat reflector. This I cut to size to cover the tempered glass. When the sun was not shining or too low in the afternoon sky the plan was to place the heat reflector over the glass shiny side down to keep heat in the oven. I also added a bright yellow plastic screw-on-lid for a 5 gallon to the bottom of the oven to allow for sliding and rotating it easily on something as rough as plywood. Its about 12" in diameter and quite strong with little surface area to create friction.
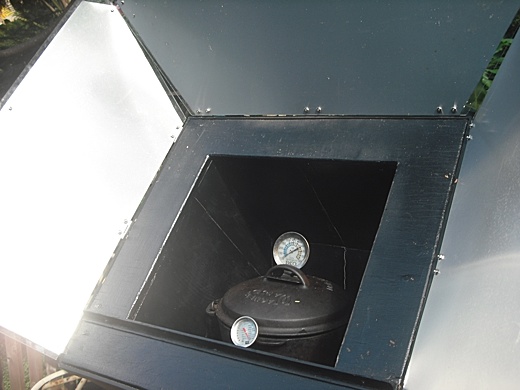
For a test I of Prototype B we chose to try our black wrought iron 10" Dutch oven on top of a 6"x6"x4" cement block. The block hoisted the Dutch oven to a good height and would help hold heat when there was no sun. On February 3rd, a clear bright day, I tested this configuration. In the sun the Dutch oven quickly got very hot to the touch. Between noon and four o'clock this configuration averaged about 250ºF with a peak of 260º from 3-4pm. At this time I folded back the aluminum reflectors and applied the windshield reflector to hold heat. The box kept the temperature over 200º past 5pm. At 6pm the temerature was 175º. At 7:30 it was 145º. This was still warm enough to serve as a hot meal. As much of an improvement as Prototype B was it was not hot enough to cook food the way I wanted it.
Prototype C
Prototype C was different from B in three significant ways.
First: I replaced the tempered glass with two sheets of thin window glass (from Home Depot). I cut these to size for my oven mouth. I also cot a 1/2" wide aluminum channel and mitered a square frame. I silicone glued the glass to both sides of the frame creating an insulated panel. This would hold in heat better.
Second: I would try a reflective surface inside the oven rather than a matte black surface I had sprayed on. I did this because I figured that although the black did absorb heat to keep the oven warm in when it was cloudy, it might be stealing heat that could be applied directly to cooking. I figured that if the inside was reflective it might actually focus more solar energy on the cookware sides and back. I made the sides reflective by screwing some of the remaining aluminum flashing cut to the profile of the side walls. The top back and front was a long curved section that looped from top to back to front.
Third: This version would have to have a more reflective surface than aluminum flashing. The plan was to use the configuration of the reflectors previously mentioned in Part -1 from (http://www.omick.net/solar_ovens/current_solar_oven.htm). That solar oven used four mirrors at a precise angle relative to the oven mouth opening and the length of the mirror. The formula is: Where "A" is the oven mouth (distance between mirrors and we'll assume it's square) and "B" is the length of the mirror (from oven to sky and all the same). Mirror Angle = 90° + [sinˉ1 x {-(B÷(4 x A)) + (0.25 x √((B² ÷ A²) + 8))}] I tried calling around the island to get some mirror glass cut to size. Not many people do it and I found it was almost as expensive as the mirrored aluminum. The alternative was to find existing mirrors. I found what I needed at Habitat for Humanity's thift Restore in Hanapepe. I bought four cheap medicine cabinets for $40 with 15"x22"glass mirrors. So . Example: oven mouth width (A) = 16”x16" reflector length (B) = 22”
Angle = 90° + [sinˉ1 x {-(22÷(4 x 16)) + (0.25 x √(22² ÷ 16²) + 8))}] Angle = 90° + [sinˉ1 x {-(22÷64) + (0.25 x √((484 ÷ 256) + 8))}] Angle = 90° + [sinˉ1 x {-0.343 + (0.25 x √(1.375 + 8))}] Angle = 90° + [sinˉ1 x {-0.343 + (0.25 x 3.0619)}] Angle = 90° + [sinˉ1 x {-0.343 + .7654}] Angle = 90° + [sinˉ1 x 0.422475] Angle = 90° + 25º Angle = 115ºThis would be the angle between the glass covering the mouth of the oven and the mirror. To gather enough solar energy the space needed with the mirrors in place this solar oven would be enormous.mirrors would have to fold down or be removable. After cutting them out of the plastic cabinets I framed them in wood with plywood backing. What was needed a system for holding them rigid in the wind that would allow for quick dismounting. I decided to used metal shelf brackets. They consist of two parts. A metal C shaped steel channel with slits separated by a inch and a bracket that wedges into the slits and can support a heavy shelf of books. The channels and the brackets can easily be custom but with a hacksaw.
I used 1"x3" trim screwed with angles to the body of the oven. the top of the 1"x3" was cut to the angle derived from the formula above. The metal shelf brackets were bolted to the 1"x3" at that angle. Finally, a length of the shelving channel was screwed and glued to the plywood backing and frame holding the mirror.
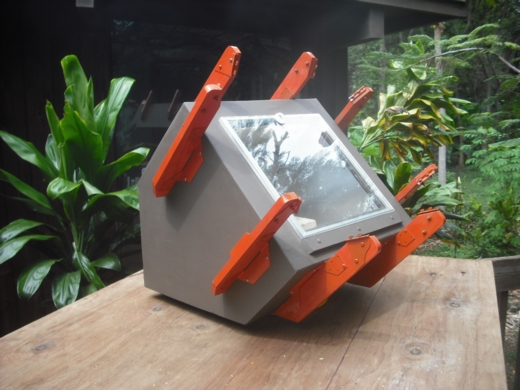
The results were that the mirrors could be securely fastened in seconds to the mounting brackets, and just as quickly removed. These panels seemed impervious to the wind, however if they were grabbed and pulled the wrong way they could get dislodged. I eventually broke a mirror accidentally dropping it off my deck.
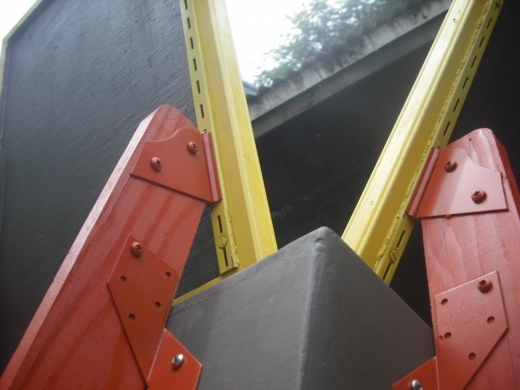
I decided to paint the mounts and mirror frame with colors of some hibiscus that bloom in our yard.

On March 20th, a day with intermittent clouds until 1:45pm, I tested this configuration. Below, is a full view of our solar oven set up and ready to go. At 2:00pm the oven passed the 260ºF achieved by Prototype B and broke 300ºF before 3pm. At 3:30 there were some puffy clouds and the oven temp peaked at 330ºF. At that point the inner glass pane on the insulated panel cracked: too much difference in expansion inside to outside. Needless to say this unit does not turn itself to follow the sun.
You have to do that yourself. Some people advise that you set the unit a little ahead of the sun. This allows you to have the sun center up on the unit while your away and be just a little behind when you return. I work at home and our solar oven is on the deck outside my office. I can keep an eye on it. So I change the rotation position of it about every 20 minutes. Performance will certainly drop off if you leave it for an hour, especially in the middle of the day when the sun is tacking across the sky the fastest. In the late afternoon you can almost leave it alone.
Conclusions I did several tests cooking with this unit with only the outer glass on the panel. The results were marginally good. I found I could set the oven up for two tasks for the day. A less ambitious one before midday and something more demanding in afternoon. One reason for this is because in the morning the oven is cold. It takes time to get it up to operating temperature.
A few hours are lost before the oven is at high temperature. Moreover, our days are not very symmetrical around the sun. Most of us usually get up after dawn and stay up long after sunset. Consequently, were are not ready to load the oven with our dinner-to-be-cooked until long after breakfast. If you remember from Part - 2 we chose to angle the face of our oven for maximum performance in the winter and in the morning/afternoon hours.
This means that between the cold morning oven and a late start the morning session is not near the performance of the afternoon. One use I have found for the morning session is something simple like toasting pumpkin seeds on a tray with a little schmear of olive oil and a sprinkle of salt. It makes a good afternoon snack or appetizer for dinner. After midday I reload the oven with the big job for the day - making dinner. The example below was a casserole in a Mexican nacho style. There are chopped chayote drizzled with olive oil, salsa, corn chips, shredded cheddar cheese, diced tomatoes and onions with some sliced black olives on top.
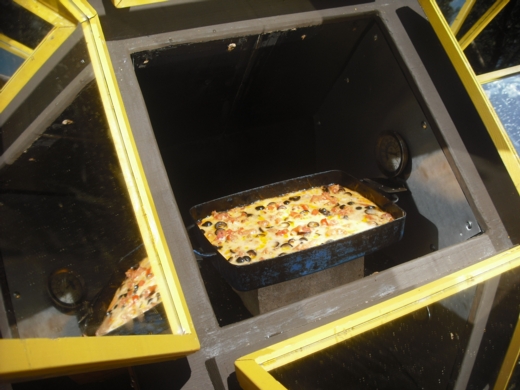
The cheese melted quite quickly with the oven in the 225ºF range. By 3pm the moister in the casserole was bubbling and the cheese browning slightly around the edge. This arrangement can coast on through the afternoon and keep the meal hot until after dark when you need it. When your done the aluminum flashing interior is easy to wipe clean if there has been a spill. The mirrors can be stowed between the brackets. It's a good idea to have a vinyl cover or small plastic tablecloth to cover it up. This will keep the rain off, keeping the inside nice and dry.
A final note - If I were to do this oven over again I would provide a tilt-back shape to the bottom rear of the unit so it could be pointed up to the midday sun between about 10:45am and 1:15pm. This would be just two vertical adjustments in the day. One must also remember that a solar oven temperature of 330º is not the same as a flame under a pan. That temperature is air temp. As you have probably discovered - a tiny match that's lit and above your hand feels a lot different than one below your hand. One you won't feel - the other will char your flesh.
See also:
Ea O Ka Aina: Solar Ovens - Part One 5/13/11
Ea O Ka Aina: Solar Ovens - Part Two 5/18/11 .
4 comments :
Awesome job!!
I suggest adding a circulation fan with
motor outside and metal blade inside.
Also recommend wearing sunglasses or even
welding goggles, as the sunlight is much
brighter 8)
Beautiful workmanship! I have found that wide metal chrome tape can be placed over any firm surface to create the reflectivity wings needed to generate the magical 300 degree heat range success.
Robert Broska in Vista, Ca.
I suggest using this technique to create first surface mirrors for your reflectors on the cheap: http://www.youtube.com/watch?v=IaEaaeajCSI
use an arduino sun following device
Post a Comment